Posted on

How Difficult Is the Valley of Flowers Trek? A Complete Breakdown

How Difficult Is the Valley of Flowers Trek

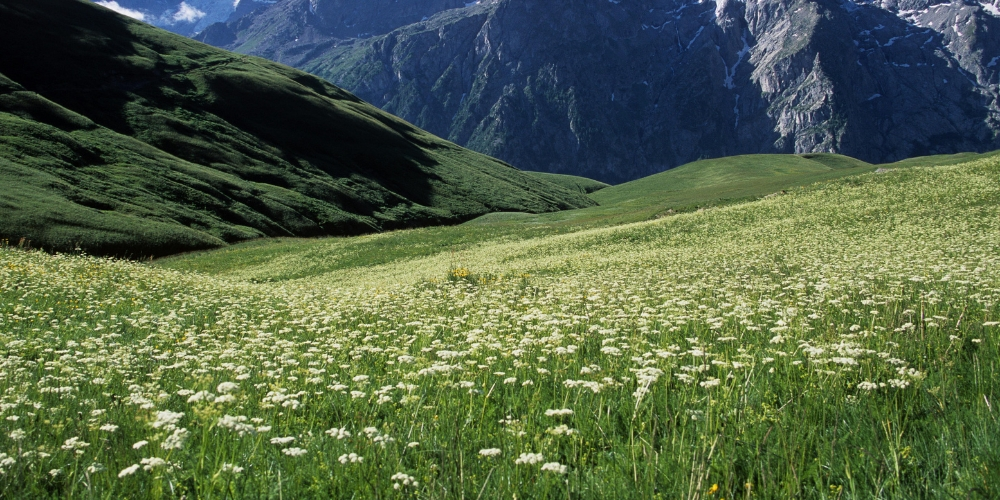
The Valley of Flowers trek offers a chance to connect with nature like never before. It’s one of the iconic Himalayan journeys in Uttarakhand that makes your mind experience what true stillness feels like. During trekking days, you hike through lush, green meadows that are absolutely full of colour. A collection of 500+ species of Himalayan flowers throughout the trek fills your heart with peace.

Sounds fantastic, right? But then the practical question hits: “How hard is it, really?” It’s the number one thing people ask. Don’t worry, we’ve got you covered. This guide will break down the difficulty of the Valley of Flowers trek. You will also learn the tough spots and the real scoop on everything you need to plan your trek itinerary and visit the Valley of Flowers.

Reality Check: Assessing the Difficulty of the Valley of Flowers Trek

Can a beginner handle the Valley of Flowers trek? They can absolutely handle it! It’s not about having a solid trekking experience. It’s about having the stamina to cover long distances. Thin air, sudden storms, conditions like these can scare you. But honestly, that’s what makes this Himalayan trek an adventure! The Valley of Flowers trek difficulty is easy to moderate. Put in a bit of training ahead of time. This will prepare you to soak in those incredible views full of a variety of flowers and mountains.

Key Points to Consider:

  • It’s easy to moderate. It’s the kind of trek where your fitness matters more than your experience.
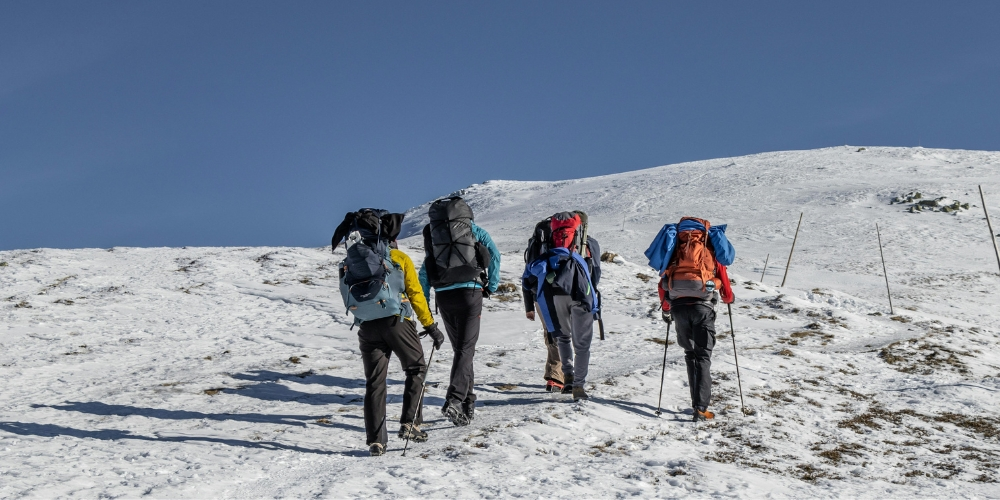
  • With every step, the air pressure drops. Proper acclimatization and pacing are key to an enjoyable trek.
  • Trails can be slippery or rocky.
  • Expect uphill stretches and long walking hours.

Walk along the trail that leads into the Valley of Flowers National Park. This moderate journey is your path to discovering why this place earned its status as a UNESCO World Heritage Site — a breathtaking world where rare blooms create a picture of colour and tranquil beauty.

The Challenging Parts of the Trek

The Valley itself lies at approximately 12,000 feet (3,658 meters) above sea level. But when you trek to Hemkund Sahib, the altitude increases. We will now explore the sections of this popular monsoon trek that come with a few challenges.

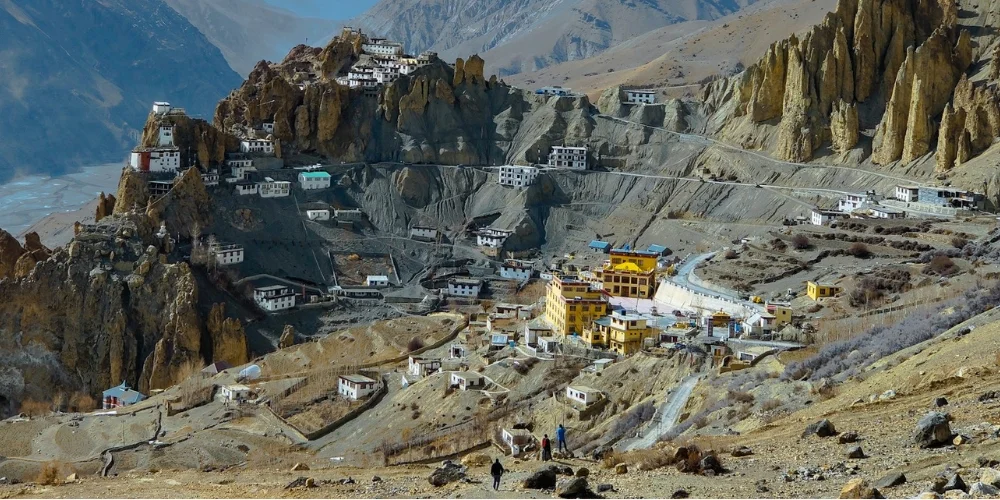
Govindghat to Ghangaria (Altitude: 1,828 m to 3,050 m)

The trek starting point is at Govindghat—the base for both the valley and Hemkund Sahib. The trek from Govindghat to Ghangaria is 4 km long. And yes, it’s steep. But it’s also incredibly beautiful. Most people need 6–7 hours to cover this. You’ll likely be tired. But that’s the point! This stretch builds the stamina you’ll need for the incredible days ahead. Every step is quietly helping your body adjust to the higher altitude.

This is an essential part of the Valley of Flowers route. Many trekkers start from Rishikesh or Joshimath before reaching Govindghat to begin the journey.

Ghangaria to the Valley of Flowers (Altitude: 3,050 m to 3,500–3,650 m)

The route from Ghangaria will be short but slippery. You will now trek to reach the Valley of Flowers. The journey is 4 km long. You need to wear good shoes. Otherwise, your attention will remain on simply walking on the slippery trails. There will be spots that will make you stop and soak in the view.

This trek from Ghangaria to the Valley of Flowers offers mind-blowing views. The moment you enter the valley, you see prominent flowers like blue poppies and orchids covering every inch of land. Truly, the monsoon season is the best time to visit the valley.

Ghangaria to Hemkund Sahib (Altitude: 3,050 m to 4,329 m)

This is the big one: the trek to Hemkund Sahib. It’s the mountain’s ultimate challenge. You’ll be climbing a steep, rocky path. Here, every step reminds you just how thin the air is up here. And a little heads-up: those 6 kilometres can be deceiving. This is a serious, all-day effort that’ll take a solid 5-6 hours. But the moment you finally lay eyes on that glacial lake? It hits you—this is a view you’ve earned with every single step. And you will absolutely earn it.

This part is the soul of the Valley of Flowers and Hemkund Sahib trek. Here, adventure meets spirituality in the heart of Uttarakhand.

Who Can Do the Trek?

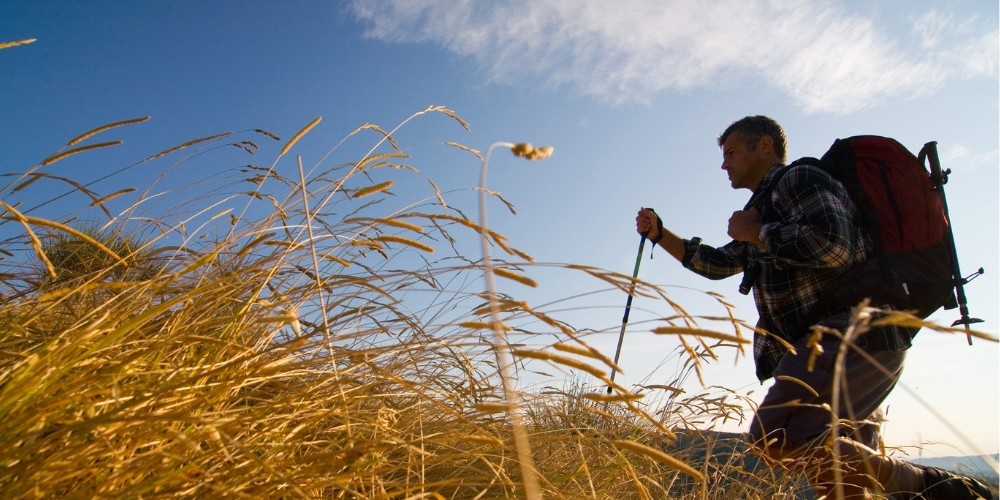
The Valley of Flowers trek distance is around 38 Km. Honestly, active youngsters can handle this famous trek in Uttarakhand. The main thing is being prepared for long days of hiking in thinner air. But listen to your body! If you have any breathing problems or other health issues, get consent from a medical professional first. It’s all about being safe so you can fully enjoy the journey. This moderate trail is a great match for:

  • Beginners who meet the fitness requirements.
  • Kids above the age of 10 (fulfilling fitness requirements) under professional guidance.
  • Older trekkers can also do the trek.

Remember the importance of having experts by your side when you visit the Valley of Flowers. Considering their help might seem normal. But they help you avoid risks on the trek that can ruin your experience. Beyond this, their instructions really make things easy for you. In addition to the guidance, you get the additional benefits that make trekking possible and easy for you.

Best Time to Visit

The best time to visit the valley is from mid-July to early September. During this time, the Valley of Flowers in Uttarakhand comes alive with alpine flowers and greenery. 

If you want to explore the valley, this is when this moderate trek is ideal, and the weather conditions are most favourable. The entire trek takes around 3–5 days and is an easy-to-moderate level trek, perfect for beginners.

Avoid early June or late September — snowmelt or post-monsoon conditions can make the trail harder.

Cautions to Follow

To make your trek to the Valley of Flowers safe and enjoyable, follow these cautions:

  • Make sure that you wear the right trekking shoes.
  • Have water, some snacks, and a small first-aid kit with you.
  • Respect nature. Do not pick or disturb the flowers like the white leaf hog or blue poppy.
  • Only follow the trek leader and the paths that are marked.
  • Save some power for the next step so that you will not suffer from altitude sickness.
  • Heads up: heavy rain or a disaster warning may change or cancel the trek itinerary due to natural calamities.

Follow these cautions. They help you enjoy the Valley of Flowers trek without stress or risk.

Conclusion

The trek to the Valley of Flowers is moderately difficult. One with an average fitness level can surely manage the trek distance if they are well prepared, take it at a proper pace, and have a trek leader’s guidance. Flowers are in full bloom if you decide to come to the valley during the best time to visit it, i.e., from mid-July to early September. Moreover, the Valley of Flowers trek cost, or trek fee, varies depending on the package, but every penny is worth it. 

Posted on

When Is the Best Time to Do the Beas Kund Trek?

When Is the Best Time to Do the Beas Kund Trek

The Beas Kund trek has a few steep climbs. They aren’t dangerous, but they do make the trek moderately challenging. No matter how difficult the trek is, you will remember your time of trekking here. In fact, every trekker leaves this place feeling like they’ve lived a lifetime in just a few days.

Why do trekkers have an incredible experience here? This is because people visit with the correct information and choose the right season. The Beas Kund trek changes its face with every season, allowing visitors to witness something different each time. 

Making up your mind to do the trek? If so, keep the importance of the right time for the trek in mind. You need to trek at the best time to make your trip truly remarkable. Up next, you’ll discover why the right time matters and when to go for the trek. 

Why Choosing the Best Time to Do the Beas Kund Trek Matters?

The difficulty level of the Beas Kund trek is moderate. In winter, the difficulty can extend due to deep snow. Let’s explore why to choose the best time to visit the trek:

Deep Snow makes things really tough.

Snow slides near Bakarthach or Beas Kund can trigger stress among trekkers. Additionally, deep snow can hide trail markings, leaving trekkers confused about the route.  

Rain Makes Trails Slippery. 

During the Monsoon season, you have to walk with a cautious mind. Most of the time, your mind is focused on avoiding the risk of slipping on wet trails from rain. 

Personal Factors That Can Make Trekking Difficult.

Personal reasons, such as an allergy to insects, respiratory issues, joint pain, or OCD, can affect your overall experience. People having these issues must always pay enough attention to selecting the best time to trek. 

Overall, receiving direct guidance from the trek guides is the best way to find solutions and have an incredible experience. 

When Is the Best Time to Visit the Beas Kund Trek?

This beautiful trek near Manali can be started from Solang Valley or Dhundi. The best time to visit here is from May to June and late September to early October. Continue to read further to know when to come here:

For Beginners

If you are new to trekking, May and June are ideal months. These are the top reasons that make this time the best for beginners:

  • The weather is stable (daytime temperatures at Beas Kund range from 12°C to 18°C), allowing you to focus on enjoying your trek.
  • Paths are clear, and markings are visible.
  • Nights are cool but not freezing, unlike in the post-monsoon season. 
  • You can walk without much difficulty and complete the trek on time. 

For Experienced Trekkers

Those with basic expertise in trekking will find the period from late September to early October ideal. Discover the primary reasons:

  • Navigating the path becomes more adventurous but not strenuous, unlike in winter.
  • Stream crossings add another difficulty to trekking after the monsoon season. 
  • The weather is pleasant, but cold winds can make it hard to go ahead. 

Other Seasons 

Generally, you can attempt trekking in the monsoon season. But try only if you have enough expertise to handle trekking challenges. Remember, even those with profound experience refrain from going ahead during this season. This is because the trails become dangerous, and you have to handle steep climbs, too. 

From November to March, the trek remains closed due to higher risks of avalanches and snowslides. The regular trekking operations are halted during the season. 

All in all, the best time to visit the Beas Kund trek depends on your experience and the weather.

Highlights of the Trek That You Witness at the Right Time

When you choose the best time to visit Beas Kund trek, you get to witness these highlights on the trek peacefully:

Dhundi and Bakarthach

The absence of rain and snow makes it easy for you to explore the beauty of the meadows of Dhundi and Bakarthach. These vast meadows, surrounded by towering mountains, make you realize how humble you are in the face of creation. 

Beas Kund Lake

Bad weather won’t allow the trek guide to continue the trek to Beas Kund Lake. He has to halt the trek for the safety of the trekkers. They all can proceed further only when the weather is perfect. Otherwise, they will have to return. 

Mountain Peaks

Beas Kund weather, when perfect, allows you to see the famous mountain peaks clearly. You can visit Seven Sisters Peak, Hanuman Tibba, Shitidhar, and Friendship Peak, and that’s where you get the best return on your efforts. 

Why Book a Package?

Connecting with the experts not only helps you find the right time to do the trek but also offers a fantastic experience, especially if you are just stepping into the world of trekking. They stay updated on the weather and inform you when to come. Besides this, their knowledge of the locality helps you avoid the chances of having a bad trekking experience. Meals, tents, and other crucial trekking equipment provided by them make your journey smoother. 

Conclusion  

This beautiful trekking destination in Himachal Pradesh offers some of the most memorable moments you will experience. You stay close to nature, feel a deep sense of calm, and understand your ability to handle challenges. The trek to Beas Kund can bring a positive change in your life by helping you build more strength and peace. Many people also choose this place for emotional healing. Whether you come here for adventure or for quiet moments, you will surely have a fantastic time.

Posted on

How Difficult is the Nag Tibba Trek for Trekkers?

Nag Tibba Trek

You’ll get everything on the Nag Tibba Trek, whether it’s dense forests, open meadows, snow-covered trails, or charming mountain villages. And the best part is that you don’t need to aim for the high altitudes. It’s a short altitude trek. You can have an incredible experience in just two days. This short Himalayan journey offers it all. What long treks offer over weeks, this one gives you in a single weekend: scenic beauty, pure adventure, and the calming stillness of untouched landscapes. It’s a compact masterpiece and one of India’s most fulfilling short treks.

But how challenging is the Nag Tibba trek really? Let’s explore the trail, altitude gain, terrain, and overall experience to understand why it’s often described as the perfect trek for first-timers.

Overview of the Nag Tibba Trek

Get a few quick details about the Nag Tibba trek with the help of the following pointers:

  • Starting point – Pantwari village
  • Base camp – 7,600 ft
  • Summit – Nag Tibba, 10,000 ft
  • Duration –  2 days and 1 night
  • Difficulty – Easy to Moderate
  • Trek Distance – 16 km (round trip)

Nag Tibba Trek Difficulty Level

Most people find it pretty manageable. In fact, it’s one of the easiest trekking destinations for beginners. It’s that sweet spot between easy and moderate. It really comes down to you: your fitness level, how you handle the weather, and if you’ve got your ‘trail legs.’ If you’re reasonably active, you’ll likely have a great time.

Here’s a breakdown of what to expect:

Trail Gradient: The first leg is a steady climb from Pantwari to base camp. The path is rocky, and you will find ways carved through forests. The second part to the summit is steeper. But it’s still manageable. Just remember to take short breaks, and you’ll be fine!

Duration: You have to trek for 5 or 6 hours on the first day. Then, 3 to 4 hours on the second day. Your trek guide will instruct you to cover the entire Nag Tibba trek distance excellently. If you have booked a reputed package, you can get a tail guide as well, who will ensure that no one is left behind. 

Altitude Gain: Get ready to climb from 4,600 ft to nearly 10,000 ft! Honestly, the formula for a climb like this is simple. First, find a pace that feels good and hold onto it. Second, pay attention and stay in the moment. Follow these rules, and your adventure will be smooth.

Fitness Requirement: The fitness bar is set at a very reasonable level. Try to manage a solid hour-long walk. And that’s all! The trek doesn’t require any profound trekking experience. 

In summary, the Nag Tibba trek is suitable for beginners. They can experience a Himalayan trek without pushing their limits too far.

Toughest Sections of the Nag Tibba Weekend Trek

The toughest section of the trek comes after the Nag Tibba base camp. Once you arrive here, you have to gain an elevation of 1000 ft in just a few kilometers to reach the Nag Tibba summit. For many people, it is not a big deal. But remember, things become tough when the oxygen level drops. This will cause your body to work harder and breathe deeply. And you will feel tired quickly. 

The climb is steep, making things quite strenuous for you to handle. It’s not a high-altitude trek. So, you won’t be facing altitude sickness problems. But still, tiredness, snow, and thin air will make the trek challenging. 

Best Time to Visit Nag Tibba

There is no denying the fact that the trek is manageable in every season. No matter if you are coming in winter or summer, you will find it easy to trek. The best time to do the Nag Tibba trek depends on your preferences. However, the winter season can add more adventure to your experience through deep snow. During the summer, you will notice lush forests and blooming flowers. You will still require a jacket and warm clothes. This is because the temperature stays around 25°C. During winter, you will have to make a way through deep snow and need warm layers. And the time window from October to November is ideal for those who want to trek in less snow and with lower difficulty than in the winter season. 

What Makes the Nag Tibba Trek Easy

Think you need special skills? Think again. For this adventure, focus on your fitness—not on being an expert. You’ll have a dedicated guide with you the entire time. He is always ready to help with guidance and support whenever you need it.

  • The entire trek to Nag Tibba is of short distance. You just need to cover a 16 km round trip. 
  • You can easily arrive at Pantwari from Delhi, Dehradun, and Mussoorie, reducing travel fatigue.
  • The regular guidance from the trek leader will simplify things for you. 
  • Trek poles, microspikes, and camping equipment are also provided. 
  • Trek operators often ask trekkers to reach Dehradun railway station, a common pick-up point. This makes the journey quite easy. 
  • With the regular support offered, the beginners can easily handle all the challenges and acquire the best trekking experience. 

Trek Package Fees

The cost for your Nag Tibba trek is flexible. The operators, season, and other inclusions impact the cost. A typical all-inclusive package averages ₹2500 to ₹5,000 per person, covering:

  • Transport from Dehradun
  • All meals
  • Guide services
  • Camping equipment
  • Safety gear

Many operators also include a trek completion certificate as a memorable finale.

Trekking Experience and Tips

Even though the Nag Tibba trek is considered an easy trek, preparation can make your experience smoother. Here are some essential tips:

  • Start your trek early in the morning. This will help you avoid the afternoon heat.
  • Use trekking poles for better balance, especially on descents.
  • Wear proper trekking shoes with good grip—avoid sports shoes.
  • Carry enough water and energy snacks throughout the trek.
  • Respect local customs, especially near the Nag Devta temple.
  • Dress in layers during winter, as temperatures can drop below zero at night.

Final Thoughts

The Nag Tibba trek is one of the best short Himalayan treks in India. Its moderate altitude, well-defined trail, and proximity to Mussoorie make it an accessible adventure for beginners and families. Whether you embark on the Nag Tibba winter trek or go during the lush summer months, the experience is both thrilling and rewarding.

If you’re planning your first Himalayan trek, this is where you should start. The Nag Tibba trek may be labeled “easy,” but its beauty, serenity, and sense of achievement make it truly unforgettable.

Posted on

Valley of Flowers Trek: Everything You Need to Know

Valley of Flowers Trek

Chamoli, also known as the Abode of Gods, is home to a beautiful valley renowned for its flowers. The valley holds profound significance for nature lovers. This is because you can find 500+ species of flowers. These also include a few flowers that are hardly found anywhere else in the world. The valley is not only recognized for its flowers, but also for its waterfalls, mountains, and various myths. If you have plans to visit the Valley of Flowers in Uttarakhand, read this guide. You will find the details that will help you plan a memorable trip.

Reasons that Make the Valley of Flowers Trek Popular

The photos of the Valley of Flowers on Google are just a trailer. The real feature presentation—the crisp air, the stunning waterfalls, the pure peace—is waiting for you in person. Let’s know the best parts of visiting the valley.

  • 500+ Species of Flowers
  • Seasonal waterfalls
  • Recognized as a UNESCO World Heritage Site
  • Wildlife
  • Beautiful scenery of mountain peaks 
  • Peaceful Villages

So, from now on, whenever you hear “the Valley of Flowers”, don’t just consider it a place of alpine flowers; consider it a lap of nature.

Location and How to Reach

The path to Chamoli’s beauty begins in Haridwar or Rishikesh. While you can fly into Dehradun, the true traveler’s choice is the train. It’s a perfect blend of affordability and the slow, beautiful unfolding of the landscape. Your journey to Chamoli looks something like this:

  • Arrive at Rishikesh or Haridwar by bus or train.
  • Then, take a bus or taxi to Govindghat.

Those who prefer planes can fly to Jolly Grant Airport in Dehradun and then take a taxi to Govindghat. After reaching this beautiful region, you can start trekking.

The Valley of Flowers Trek itinerary 

It’s a 4-day trek from Govindghat, excluding the time it took you to reach the town. Let’s take a look at the day-wise planning:

Day 1: After arriving at Govindghat, you trek to Ghangaria. It takes 5–6 hrs and the trek distance is  9 km. The Pushpawati River will enhance the thrill level. You cross bridges and forests. On the way, you witness the incredible waterfalls.

At Ghangaria, you spend the night and prepare to continue. Just soak in the views and enjoy the delicious meals your trek team provides.

Day 2: Then, in the morning, start walking towards the Valley of Flowers. Remember, before starting here, you will have to receive the permit to enter the valley.

You have to return to Ghangaria on the same day. This is because nobody is allowed to stay overnight in the valley.

Day 3: After coming back to Ghangaria, you can extend your journey by trekking to Hemkund Sahib. You should go for this if you have a strong inclination towards spirituality. This trek can be done in one day.

Day 4: Return to Ghangaria and then to Govindghat.

You have to cover the total trek distance of 38 km. So make sure to prepare yourself for that. 

Best Time to Visit the Valley of Flowers

The perfect time to visit the Valley? The short window is from July to September. This is when the valley is at its most vibrant, offering the legendary floral display you’re dreaming of.

  • Mid-July to August: Ideal for flowers and lush greenery.
  • Late August to early September: Slightly fewer flowers but clearer skies.

The valley’s long winter closure under deep snow is what makes a summer trek such a rare and special privilege. It’s a fleeting spectacle of nature.

Here’s a tip from seasoned hikers: always make one final check of the forecast and trail status. It’s the easiest way to trade potential headaches for pure, uninterrupted awe.

Trek Difficulty and Fitness Requirements

This trek is honestly the Himalayas’ perfect challenge, feeling less like a test and more like a celebration of what you can do. That “moderate” label is just a promise that you’ll finish feeling incredibly proud, not exhausted.

During the trekking days, you’ll trace a path through some of Earth’s most gorgeous landscapes. You’ll walk about 40 kilometers, slowly rising into the air that feels a little lighter and a lot more magical. Your entire strategy boils down to two things: find your own natural rhythm and treat your water bottle as an essential.

Go with a group. Unless you’re a pro at high-altitude trails, sharing this with a guide and fellow adventurers turns a great trek into a soul-stirring experience.

Things to Carry 

Carry what is necessary. Simple guidance from the trek leader will help you pack smartly.

  • Trekking Shoes
  • Warm Clothes:
  • Rain Gear
  • Medical Kit

It’s not allowed inside the valley to litter or pick flowers. Help keep this natural wonder clean.

Experience Inside the Valley

Once you reach the valley, you’ll understand why it’s so loved. The entire valley seems painted with blooming flowers. The sound of streams, cool mountain air, and views of snow-capped peaks make it a paradise for every trekker.

You can explore the valley as far as the trail allows. However, you must return by evening, as overnight stays are not permitted in the valley. The flowers and Hemkund Sahib trek together make this one of the most spiritual and scenic experiences in India.

The Valley of Flowers and Hemkund Sahib together offer a mix of natural beauty and spiritual peace. Many trekkers call it a “journey for the soul.”

Final Thoughts

It is always advisable to have experts by your side when you are trekking. No doubt, trekking in the valley is safe, but experts offer the best advice to reduce the risk of altitude sickness and other problems. Their job is not only to show you the path. In fact, they also keep an eye on your health on the trek. This allows them to provide immediate attention if you need to handle health issues. We hope you have received all the information you need to plan your Valley of Flowers trek. So, don’t hesitate! Connect with the experts now and visit this incredible location.

Posted on

How to Reach Spiti Valley from Shimla

Spiti Valley from Shimla

Traveling to the Spiti Valley is a dream of so many youngsters. There is no other region like the Spiti Valley. Why? It’s a region that is home to the World’s highest village and post office. Riding a bike on the roads gives an incredible experience. The mountains and sky that surround these roads make your traveling experience wonderful. Spiti’s epic landscapes await. But getting there is half the fun. To ensure your adventure is all awe and no ordeal, let’s talk about how to reach here. For a truly spectacular entrance, the road from Shimla is a traveler’s favorite. 

Overview of the Journey

The distance from Shimla to the Spiti Valley is around 450 kilometers. This isn’t a journey to be rushed. It’s a two-day pilgrimage best broken with a night under the stars in Kalpa, letting the mountain silence sink in.

This journey is a living story written in landscape. It begins in the deep, emerald forests of the Kinnaur Valley. And then, it unfolds into the bright, bold stanzas of a high-altitude desert. Getting to Spiti is the goal. But believe us, the journey in the heart of Himachal Pradesh itself is the adventure you’ll remember most.

Why Choose Shimla to Spiti Valley Road Trip

One can reach this beautiful region in two ways: From Shimla or Manali. The route from Shimla is longer. But many travelers still prefer this route for its smoothness. On the other hand, the route from Manali is shorter but steeper, which travelers prefer on the way back from Spiti and Lahaul Valley. 

Gradual Altitude Gain:  The trip to Spiti Valley from Shimla is longer. But a gentle elevation gain makes travelers choose this route. Therefore, it’s a strategic choice for your own wellbeing.

Scenic Beauty: Every stop along the route offers a glimpse of Himachal’s beauty. From ancient villages and apple orchards to calming rivers and beautiful mountains, everything makes your journey memorable. 

Better Road Conditions (Initially): The Shimla route remains the more reliable choice. Why? Simply put, the high passes from Manali are still snowed under.

Open for Longer Periods: The Manali–Kaza road remains closed during winter. However, the Shimla side usually stays open for most of the year.

Shimla To Spiti Valley Distance

The distance between Shimla and Spiti Valley is approximately 450 km. Travelers often refer to it as the ultimate Shimla-to-Spiti Valley road trip. You can choose between two main approaches: via the Shimla side or via Manali and the Spiti Valley. While the Manali to Spiti route is shorter, it’s steeper and often closed in the winter. Therefore, the Shimla side is considered the safer and more scenic option.

Detailed Shimla to Spiti Valley Route

It takes two or three days to reach the Spiti Valley from Shimla. Here’s a breakdown of the most common route from Shimla to this Valley in Lahaul and Spiti:

Shimla → Narkanda → Rampur → Reckong Peo → Kalpa → Nako → Tabo → Kaza (Spiti Valley)

Let’s understand this Spiti Valley tour better:

Shimla → Narkanda: 60 km 

The real Spiti Valley trip starts where Shimla ends. What opens up before you is a road that tells a slow, beautiful tale—one of towering pines that feel like nature’s cathedrals and orchards stepping up the hillsides. And your first chapter starts in Narkanda. This quiet little town is your perfect sanctuary.

Narkanda → Reckong Peo / Kalpa: 160 km

Now move towards Reckong Peo. Feel the air warm as you descend to the Sutlej. Now, forget the clock. For 220 kilometers, your only job is to watch the light dance on the cliffs and listen to the river’s endless song. This is where the journey truly lives.

Kalpa → Nako: 110 km

From Kalpa, the road climbs higher along the Hindustan–Tibet Highway. You’ll pass through scenic villages like Puh and Khab before reaching Nako. It’s a charming village near the Spiti River. The Nako Lake is a must-visit spot here.

Nako → Tabo: 70 km

A three-hour scenic drive takes you to Tabo. It’s a beautiful region that is home to a 1000-year-old monastery. Walking its grounds is like stepping directly into Himalayan history.

Tabo → Kaza: 50 km

The final stretch from Tabo to Kaza takes around 2 hours. Kaza is the main town in Spiti Valley and the center for most travel and stay options. Once you reach Kaza, you’ll feel the true charm of Spiti — with its barren mountains, monasteries, and cold desert beauty. A short drive from here leads to Pin Valley.

Modes of Transport from Shimla to Spiti Valley

There are several ways to travel from Shimla to the Spiti Valley, depending on your budget and travel style.

1. By Car or Bike

Love riding bikes? Then, fulfill your dream by renting a bike or a car to cover the route. Many people prefer this kind of Spiti road trip, especially those who love freedom and mountains. But make sure your bike can handle rugged terrain. 

2. By Bus

If you prefer public transport, buses from Shimla to various points along the route are available.

  • Shimla to Reckong Peo: Regular HRTC buses run daily.
  • Reckong Peo to Kaza: There is a direct HRTC bus that leaves early in the morning and reaches Kaza by evening.

Though the journey can be long, it’s budget-friendly and perfect for travelers who want to experience local life.

3. By Taxi or Shared Cab

You can also hire a taxi from Shimla or join a shared cab. Taxis offer more comfort and flexibility than buses but are costlier. Shared cabs, often used by locals, are cheaper but may be crowded.

The Best Time to Visit

The Spiti Valley is ranked among the top snowfall places in Himachal Pradesh. Let’s know when you can visit this place:

SeasonTimeframeRecommended?
Ideal Visiting WindowMay – October✅ Yes
Peak SeasonJune – September✅ Yes (Best)
WinterNovember – April❌ No

Final Thoughts

Sometimes the journey really is the best part. Spiti Valley is a marvel. But the ride there, primarily via Shimla, is an adventure you’ll never forget. Come and see for yourself. Let the wild beauty of the landscape do the rest. We hope this comprehensive travel guide has been helpful to you. So, what are you waiting for? Explore the top Spiti tour packages and visit Spiti Valley with your friends today!

Posted on

What Is the Difficulty Level of the Chopta Chandrashila Trek?

The Chopta Chandrashila Trek is more than just a walk—it’s a journey where every step feels meditative. As you ascend, the chill in the air, the snow-dusted trail, and the breathtaking views create an unforgettable experience. Then comes the legendary Tungnath Temple—a perfect pause in your climb.

So, how challenging is the Chopta Chandrashila Trek? The difficulty mainly depends on your fitness level, weather conditions, and the season you choose. This blog will show you what sets this trek apart and its actual difficulty. Plus, we’ll prepare you for the specific challenges on the path.

Highlights of the Chopta Chandrashila Trek

The trek takes just 3 to 4 days to complete. Yet its beauty remains with you for years. Your eyes will behold incredible, famous mountain peaks. Your spirit will find calm in deeply peaceful temples. The path under your feet is gentle and offers a truly welcoming start to any new trekker’s journey.

Stunning Views: Prepare to be amazed by the views that this famous trek in Uttarakhand has to offer. Peaks like Nanda Devi and Trishul rise before you. These views make your rushing mind stand still. This helps you fully embrace nature.

Start Point – The Mini Switzerland of Uttarakhand: Your trek starts in Chopta – a calm and beautiful village. This spot is known as the Mini Switzerland of Uttarakhand. This is because it sits in a ring of beautiful forests. You can also visit the Deoriatal Lake before reaching Chopta.

Through Forests and Meadows: Start from Chopta and step into the forest’s embrace. The Chopta Tungnath trek route weaves under a green canopy. A gentle breeze whispers through the leaves. 

Tungnath Temple – The Highest Shiva Temple: Halfway up, you’ll see Tungnath Temple. The sacred stop sits at 12,100 feet. This makes it the highest Shiva temple in the world. Its ancient stone structure blends into the snowy peaks. Many trekkers pause here not just to rest, but to soak in its calm energy.

Is the Chopta Chandrashila Trek Easy or Difficult?

The Chopta Chandrashila Trek is rated easy to moderate. Beginners can complete it comfortably when trekking during favorable seasons. You’ll surely need to have a basic fitness level. But your whole experience really depends on when you go.

Summer Trek Difficulty: Like many other treks, this trek’s difficulty level is decreased during summer. It’s all thanks to the clear weather and straightforward trail. With no snow, you’re free to enjoy the views instead of just watching your feet.

Winter Trek Difficulty:  During winter, the snow-covered trail adds challenge, but with proper gear and guidance, the short distance and gentle altitude keep it manageable.

Overall, the trek difficulty level remains manageable except in winter. Trekkers often call this the best first snow trek in the Himalayas.

Factors That Determine the Trek’s Difficulty

Several factors decide the Chopta Chandrashila trek difficulty level. Understanding them will help you plan your best itinerary and enjoy the trek safely.

Altitude and Height

The Chopta Chandrashila trek reaches a height of around 13,000 feet. Reaching this level can seem exciting. But don’t forget that at such an elevation, oxygen is less. This will not only lead to difficulty in breathing but also to headache and exhaustion. During the tough parts of the trek, a guide assists you in handling challenges. 

Trek Distance and Duration

Don’t let the summit scare you. The total trek distance is only 8 to 9 kilometres round trip. You can finish the entire trek in just three or four days. Almost everyone breaks it up with a night in Chopta. This makes the whole experience peaceful and manageable.

Terrain and Gradient

Your journey starts gently from Chopta, meandering through peaceful forest paths. The challenge ramps up near Tungnath Temple. It’s the final test of your persistence: a steep, careful climb over rock and snow to the chandrashila peak. 

Best Time to Visit

The weather really shapes your trek. For the best experience, aim for March to May. The autumn stretch is another prime season. It offers those clear, comfortable days, right before winter blankets the path in snow and wind.

Fitness Level

Every trek requires a basic fitness level. So does the Chandrashila Chopta trek. Of course, you are aiming for a high-altitude trek. So focus on building your stamina for a solid three-hour walk.

This trek is a manageable, easy-to-moderate adventure. Do the basic prep. And it becomes a fantastic, completely achievable goal for your first high-altitude experience.

Challenges You Might Face and How to Tackle Them

No doubt, this unforgettable trek is beginner-friendly. But some challenges may arise throughout the trek. Knowing them beforehand helps you stay confident.

Steep Sections

The section between Tungnath and the Chandrashila summit is the most challenging part. The slope kicks up and gets pretty rocky. Your strategy will matter a lot. Take it slow and steady. And don’t forget to bring trekking poles. They help you in maintaining balance.

Weather Fluctuations

Never trust the Himalayan sky. A clear morning can quickly turn into a foggy or snowy afternoon. Therefore, it is always best to pack layered clothing. 

Snow and Ice (Winter Trek)

Walking on snow might seem a dream come true. But keep in mind, it is always challenging to walk on the snow. This is because the trek route becomes slippery. Also, the climb from Tungnath to the main summit is quite steep. Make sure to follow the instructions from your trek leader. 

Altitude and Fatigue

At high altitudes, your body needs more oxygen. Drink water often and take short breaks. Avoid rushing. Proper rest at Chopta before starting the trek helps your body adjust.

Limited Facilities

Chopta, the beautiful village, is the last stop where you can find the facilities. These include snacks, electricity, and medical help. Once you move on to trekking, you have to manage everything on your own. There are no shops and tea stalls. Your trekking guide will arrange things for you.

Conclusion

Here’s the truth: this isn’t a trek just for experts. Chopta Chandrashila is famously doable, even if you’re new to this. You get a perfect mix—peaceful forest walks, a profoundly spiritual temple visit, and a payoff at the top that is 100% worth it. The walking is manageable. And if you prepare correctly, you’re guaranteed an amazing and peaceful experience.

Posted on

What Is the Best Time to Visit the Chopta Chandrashila Trek?

Chopta Chandrashila Trek

Trekking goes beyond adventure; it challenges you and changes you. Completing a trek successfully is an accomplishment in itself. You learn about your resilience and patience. Uttarakhand is a place with over 70 recognized treks, and the Chopta Chandrashila Trek offers a touch of spirituality. With every step, you walk toward a magnificent summit and a calmer mind. Here, the mountains don’t just test your strength—they teach you stillness.

The biggest challenge you’ll face with this adventure won’t be on the trail, but in the planning: picking your season. Every season lets you witness a different environment. Understanding these seasonal shifts helps you decide the best time to visit the Chopta Chandrashila trek.

The Best Time to Visit Chopta Chandrashila Trek

You can do the Chopta Chandrashila Trek in any season, and it feels like a whole new journey. Are you there for flowers? Then, choose the spring season. Summer is perfect for clear weather. Autumn is an ideal season for unmatched views. It all comes down to what kind of memory you want to make. Let’s explore each season in detail.

Autumn (October to November)

Autumn is considered the best time to trek to the Chandrashila summit. There are a few prominent reasons that make this season perfect for the trek. The weather is cool. But it is not extremely cold, freezing. The crystal-clear skies allow you to witness clear views of the mountain peaks in the Himalayas. 

Reasons to Choose This Season:

  • Sharp mountain views due to clear skies.
  • Perfect visibility of Chaukhamba and Trishul.
  • Safe trails and sunny days for easy trekking.
  • Nights are cold but manageable with proper gear.
  • A great season to experience the true spirit of Himalayan trekking.

Spring (March to April)

If you love stunning floral displays, spring is your season! Covering the trek distance, which is usually around 5 to 5.5 km one way, becomes really easy. The rhododendron flowers cover the trek route. The whole region feels fresh and green after winter. Furthermore, the comfortable temperatures make those long days on the trail an absolute joy.

Reasons to Choose This Season:

  • The forests glow with flowers in shades of red and pink.
  • The meadows are green and seem to be full of life.
  • Days are moderate. But nights are only slightly cold.
  • The entire trek route from Chopta to Tungnath looks stunning with flowers. 
  • Skies are clear, allowing you to witness stunning views of Chaukhamba and Nanda Devi peaks.

Summer (May to June)

For trekking newbies, summer is the perfect option. The difficulty level of the Chopta Chandrashila Trek during the season is quite low. Friendly weather and open trails make your journey a truly memorable first mountain adventure. The best part is that you can also offer prayers in the Tungnath temple. During the winter, extremely harsh conditions don’t allow you to remove your shoes to avoid frostbite. So you may not be able to enter the Temple.

Reasons to Choose This Season:

  • Pleasant weather with safe and open trails.
  • Meadows and valleys are lush green.
  • Tungnath Temple can be visited in its full charm.
  • Deoriatal Lake reflects the snow peaks, creating picture-perfect views.
  • Longer days allow you to start early, trek to Chandrashila, and return comfortably before evening. 

Monsoon (July to September)

The monsoon season makes this trek not only challenging but risky, too. The slippery trails and a higher risk of landslides are going to create a lot of trouble for you. The strenuous climb is often met not with a view, but with a wall of cloud obscuring the view. For better views and safer climbs, visit in another season.

Reasons to Avoid/Consider This Season:

  • Trails become muddy and unsafe.
  • The risk of landslides increases.
  • Clouds often block mountain views.
  • Meadows are at their greenest.
  • Most trekking experts avoid trekking during this season. 

Winter (December to February)

The winter months make the Chopta Chandrashila trek one of the best winter treks in Uttarakhand. The meadows are covered in white snow. No doubt, the Tungnath Temple often lies buried in snow. But it still looks beautiful and fills you with positive energy. The entire trail feels magical under a thick blanket of snow.

Reasons to Choose This Season:

  • Chopta village, the base camp, looks stunning in winter. 
  • The snowfall makes the trek extremely challenging.
  • From Tungnath to Chandrashila peak, the way is quite exciting. 
  • Astonishing views of snow-covered peaks like Chaukhamba and Nanda Devi.
  • Winter trekking requires preparation. You need proper gear and guidance from a trek leader.

Things to Remember for a Successful Chopta to Chandrashila Trek 

Every adventurer begins somewhere. Let Chopta Chandrashila—with its beautiful trails and supported journeys—be where your story unfolds. The Chopta Chandrashila trek is known for its easy-to-moderate difficulty level. Make sure to book an ideal package to receive the best guidance. Moreover, bear these tips in mind for an incredible experience. 

Prepare for High Altitude: At ~3,700 meters, the altitude of Chandrashila can make it challenging for you to trek. Follow the instructions from the experts. Also, maintain the right pace when trekking.

Right Gear: Good trekking gear is essential. In winter, carry snow gear. Also, don’t remove your gloves and socks. Otherwise, you have to warm them to prevent serious cold injuries. 

Watch the Weather: The Himalayan weather can change quickly. Get expert help to plan the trip in the right weather. Mostly, the trek experts ask you to wait until the weather becomes clear and recommend the best time to trek. 

Tungnath Temple: The spiritual site is not always open. Usually, it opens in April and gets closed in November. When it snows here, you can’t remove your shoes and socks to prevent health issues. Thus, you can’t enter the temple premises, even if it is open.

Plan Your Itinerary: The trek usually starts from Chopta and covers Tungnath and Chandrashila in one or two days. Adding Deoriatal makes it longer and more scenic. Get the proper instructions from the trekking experts. 

Conclusion 

The breathtaking views of the Himalayas are enjoyed in the right season. A season when it is not raining and allows you to go further. When it comes to deciding the best time to do the Chopta  Chandrashila trek, Autumn is considered the best. But you can also trek in other seasons. Apart from this, guidance from professionals allows you to enjoy the trek rather than worrying about where to go next and how to manage things. Hence, book an ideal package for a successful trek. 

Posted on

Is Kuari Pass Trek Difficult for Kids and Families?

_Kuari Pass Trek Difficult

Few treks on earth offer a payoff quite like the Kuari Pass. From its summit, you don’t just see one or two peaks; you stand before a row of Himalayan giants. It’s a view that stays with you forever. But such a grand adventure begs an important question. For families wondering if they with their younger ones can complete the trek, the key is to read the map of its challenges before writing your own unforgettable tale.

This guide will help you learn if kids and families can cover the Kuari Pass trek or not. You will also explore the challenges that they can face while trekking. 

Can Kids and Families Do the Kuari Pass Trek?

The trek reaches an altitude of 12,500-12,516 feet, and demands at least 4 hours of walking daily for three days. From this, you should understand the significance of physical fitness to complete the trek. Generally, there are no rapids or risky trails. But there are steep climbs. And the trek is not easy; it is moderate. A child below 15 years and an elder above 60 years will find it really strenuous to cover the trek. 

For sure, trekking experts can offer the best help, but what is important is to listen to their instructions. One of the most important instructions they give to their followers is to stay physically fit to cover the trek. 

In short, kids above the age of 15 and older members below the age of 60 can go for the trek. But they can trek as long as they meet the physical fitness requirements of the trek. 

Kuari Pass Trek Difficulty Level

Kuari Pass Trek is of moderate difficulty. Here’s what that means in this particular trek:

  • It is not a technical climb. Therefore, you won’t need ropes, ice axes, etc. in usual seasons. Basic hiking / trekking gear is sufficient to handle altitude gain.
  • Navigating from Khullara to Kuari Pass is challenging. This is because the section involves steep climbs.
  • The trek goes up to ~ 3,800. At these heights, AMS can occur, especially in the early stages of the trek.
  • Seasonal / weather conditions can significantly raise the difficulty. Trekkers may struggle with snow, slippery trails, fog, or rain.

Factors That Affect Trek Difficulty for Families

Kuari Pass Trek difficulty is never about just one element—it’s the combination of altitude, weather, itinerary, and preparation that defines the experience. Several factors determine whether this unforgettable Himalayan adventure is suitable for kids and families. Below are the key factors:

Altitude and Acclimatization

The trek tops out at over 12,500 feet. Up there, the air is seriously thin. Oxygen levels drop, and the difficulty level of this moderate trek is increased. Children and elderly trekkers may feel exhausted even after walking a short distance. Gradual ascent is built into the trek itinerary. This helps reduce the risk of health issues.

If you are making up your mind for the winter trek, remember that deep snow makes it hard to walk on the terrain and slows down the trek. No doubt, in the winter, Kuari Pass trek is beautiful. But it requires extra caution as trails may be slippery.

Fitness Level

The trek involves regular walking over multiple days. A moderate level of fitness may not hold you back. But preparation is crucial. Families should practice climbing stairs regularly to build stamina. The trek typically requires 4–6 hours of walking per day.

The Kuari Pass trek is not considered an extreme expedition. But without preparation, even an easy-level trek in the Garhwal Himalayas can feel difficult. Fitness levels directly affect whether kids enjoy the trek or struggle with fatigue.

Weather Conditions

The weather totally makes or breaks this trek. Your best bet is to go between March and April or September and November. During these months, the weather is stable and the trails are much more manageable. Families can handle the challenges easily.

Attempting the trek in peak winter means making a way through snow-covered paths. Families with younger kids should avoid the trek in winter. Trek leaders usually inform their groups about the expected weather before they start the trek.

Trail Conditions

The Kuari Pass trek route is generally safe. But some stretches are narrow or steep. For example, the climb from Tugasi to Khullara can be tiring for beginners. Kids may need support from adults during such sections. Trek leaders make the trek easier by guiding the group safely. They ensure the pace is comfortable for all members.

Throughout the trek, expect rocky patches and meadows. The terrain variety is what makes the Kuari Pass adventure memorable. But it also adds to the trek difficulty.

Distance and Duration

The Kuari Pass trek distance is around 34–36 kilometers. The trek typically takes 6 days. The actual trekking days demand consistent walking. The first day of the trek involves easy trails from the base camp. However, as you move forward, you have to walk on steeper climbs.

The entire trek is spread out to make it manageable for beginners and families. No matter, this reduced difficulty, but the continuous walking at high altitude can feel strenuous if not well-prepared.

Age and Trek Difficulty

The trek can be attempted by children above 15 years old. But they can trek only if they maintain a good level of physical fitness. Younger children may find it problematic to keep pace. Adults should maintain a slow pace and provide support to kids.

For members who are above the age of 60, the trek remains manageable if they are in good health. Monitoring signs of fatigue and altitude sickness is essential throughout the trek.

Trek Leader and Itinerary Guidance

Every organized Kuari Pass trek comes with a guide who keeps an eye on safety, how everyone’s feeling, and the pace. The whole schedule is built for a moderate challenge, which is great for families. The key is just to listen to your guide and speak up if you start feeling off.

Having a guide is a game-changer. Book the Kuari Pass trek package if your group has kids and first-timers. They make sure you take breaks when you need to for acclimatization and are always there to remind you to drink up at camp.

Best Time to Visit Kuari Pass Trek with Family

The best time to do the Kuari Pass trek is during the months of March to April and September to November. During this period, the weather is stable and trails are clear. Due to these, trekking becomes easier for kids and families. Avoiding extreme winter conditions reduces the level of difficulty and ensures a safe experience.

Without any doubt, the Kuari Pass trek offers the best views. But they can be witnessed only in the right season. It’s advisable to avoid the monsoon and winter seasons due to slippery trails, poor visibility, and deep snow.

Conclusion

The Kuari Pass Trek is a moderate-level Himalayan trek. 12,500–12,516 ft is the maximum altitude that you reach. Trekking from Khullara involves steeper, more challenging terrain. But the guide for the Kuari Pass ensures safety and direction. Children above the age of 15 and elders below the age of 60 can explore the beauty of Kuari Pass without overexertion. Children gain exposure to nature, adventure, and the Himalayan trek experience, while adults enjoy breathtaking views and the satisfaction of completing a high-altitude trek. But it is important to have a trekking guide for the best guidance and instant help when you need it. 

Posted on

How Difficult Is the Dayara Bugyal Trek?

Dayara Bugyal Trek

Looking for a beautiful and moderate Himalayan trek? The Dayara Bugyal trek is a fantastic option. Vast meadows, gentle terrain, and a peaceful environment all lead to an incredible experience, and the Dayara Bugyal trek has all that. But so many people stay confused about the difficulty level of the trek. Generally,  the trek is considered a moderate trek, but not when it snows here.

The trek difficulty also depends on seasons, fitness level, and other factors as well. The level of hardship that one faces while trekking can be different. In this guide, we will explore how difficult the Dayara Bugyal trek is. We will also help you gain a deep insight into the experience that you will have during each season.

Dayara Bugyal Trek: Distance and Duration

Distance: The Dayara Bugyal trek is an 18-22 km round trip. Each day covers a manageable 4-7 km. While this distance is comfortable for most, walking for hours can be tiring for first-time trekkers.

Duration: The trek takes at least 3 to 5 days to complete. Each day involves short hikes and extended periods to take rest. It is a perfect choice for those trekking for the first time. 

Altitude and Acclimatization

Maximum Altitude: The Dayara Bugyal trek height reaches 3,500 meters at Dayara Top. This may sound high. But the gentle terrain makes it easy for you. Trekkers with the right gear and guidance cover the distance with ease. 

Altitude Challenges: At this height, you may feel slight breathlessness or mild fatigue. This can become extreme when you are on the final climb to Dayara Top. The air becomes thinner, but the chances of severe altitude sickness are low throughout the trek.

Dayara Bugyal Trek Difficulty Level According to Seasons

The Dayara Bugyal trek is a famous trek in Uttarakhand and is generally moderate. But seasons play a great role in increasing the difficulty level of the trek.

Difficulty Level in Summer (May – June)

This is the best season to visit the Dayara Bugyal trek. During this time, the difficulty level is easy to moderate. The trail is dry. In addition, the gradual altitude gain from Raithal to Dayara top feels comfortable. Walking conditions are smooth, making this season ideal for first-time trekkers.

Highlights of Summer Trek Difficulty:

  • Dry and stable trails
  • Easy walking conditions
  • Comfortable weather
  • Perfect season for beginners

Difficulty Level in Monsoon (July – August)

The Dayara Bugyal trek difficulty level in the monsoon is challenging. It is harder than summer because of wet trails and poor visibility. Streams swell, and leeches can also be an issue in the forest sections. Trek leaders often avoid this season for safety reasons.

Highlights of Monsoon Trek Difficulty:

  • Slippery terrain
  • Unpredictable weather
  • Greater risk of injuries
  • Unsuccessful trek

Difficulty Level in Autumn (September – November)

Trekking becomes easy during the season. The trail to Dayara Bugyal is clear after the rains, and the altitude gain feels smooth. With pleasant weather and golden meadows, this season offers the most comfortable trek experience. Beginners can prefer this season to enjoy the trek. 

Highlights of Autumn Trek Difficulty:

  • Clear and stable trails
  • Pleasant daytime conditions
  • Safe and simple walking
  • Best balance of ease and beauty

Difficulty Level in Winter (December – February)

The Dayara Bugyal trek is a popular winter trek in Uttarakhand. The difficulty level of the trek during this period is quite high. Snow covers the trail from Raithal to Dayara Top, and walking becomes slower. Cold temperatures and slippery snow increase the challenge. But they also create a magical snow trek experience.

Highlights of Winter Trek Difficulty:

  • Snow-covered trails
  • Freezing temperatures at night
  • Longer trekking hours due to slow pace
  • Demands careful preparation

Difficulty Level in Spring (March – April)

The difficulty level of the Dayara Bugyal trek in spring is easy to moderate. Some snow patches remain. But they are not hard to cross. The trek is relatively easy in comparison to other seasons. The weather is pleasant, and trails are mostly open. This makes the trek manageable for most people.

Highlights of Spring Trek Difficulty:

  • Occasional snow patches
  • Clear and open trails
  • Comfortable walking weather
  • Gentle mix of ease and adventure

Is Dayara Bugyal Trek Difficult?

Understand that this high-altitude trek has gentle terrain and is 22 Km long (up and down). Therefore, the trek journey comes with moderate difficulty. In fact, the trek is considered the perfect trek for beginners in summer. But during winters, the meadows of Dayara Bugyal are covered with snow. The route of the trek looks different. Deep snow makes it really difficult and exhausting for the trekkers to complete the trek. 

Trekkers face steep climbs on the first day of the trek as the trail rises from Raithal village. When you trek from Gui, the terrain becomes quite gentle and beautiful until you reach Dayara Bugyal. This final way to Dayara Top, the highest point of the trek, is the part that is going to test you the most. At this altitude, around 3,500 meters, the air feels thinner and the climb is steeper. 

Your choice of trekking package is key to the best experience. With a skilled guide setting the perfect pace and managing the climb strategically, your journey becomes significantly more enjoyable and smooth.

Best Time to Visit Dayara Bugyal Trek

The best time to visit the Dayara Bugyal trek is during summer (May–June). But a huge throng of experienced trekkers also prefer autumn too. This is because during this time, the weather is clear and the trek is open. They enjoy spectacular views. In winter, the Dayara Bugyal trek altitude offers a refreshing highland experience and covers snow-clad meadows. This makes it look magical but more challenging. 

Depending on the duration of the trek, usually 3–5 days, each day’s trek offers breathtaking scenery. The best part is that you experience this incredible journey under ideal conditions. At 12,000 feet, you reach the trek’s pinnacle. Your effort is repaid with the beauty of Dayara Bugyal meadows and panoramic views of the Himalayas.

Conclusion

Wondering about the challenge of Dayara Bugyal? Honestly, how tough you find the trek depends a lot on the time of year and your own fitness. It’s different for everyone! First-time trekkers should aim for summer or autumn. In spring, a dusting of snow adds a gentle thrill. Winter demands more resilience, blanketing the path in deep snow. The monsoon, however, hides the trail with rain and mist. Choose a season that allows you to fulfill your expectations.

Posted on

Nag Tibba Trek: Everything You Want to Know

Beyond adventures, trekking allows you to experience a moment of stillness. You sit on the ground, have dinner with friends, and gaze at the mountain peaks and an endless sky. However, trekking requires grueling efforts, but not always. Nag Tibba trek, a two-day trek, allows you to experience a Himalayan adventure without backbreaking efforts. 

Making up your mind to go on this popular trek? If yes, this blog will acquaint you with everything that you want to know about the trek, including the trek distance, the best time to visit, route conditions, and more. 

Where is Nag Tibba Located?

The foremost thing that you will want to know about the trek is its location. The trek, with its base camp at Pantwari,  is considered a popular winter trek in Uttarakhand. At 9,915 feet, this easy grade trek proves you don’t need extreme altitude for epic views. Trek through beautiful forests, sleep under starry skies, and wake to misty mountain vistas – all without months of training. Note that by deciding to trek Nag Tibba, you will be climbing to the highest peak in the lesser Himalayan region. 

Why Is Nag Tibba Trek Popular?

Nag Tibba is often called thebest weekend trek from Delhi or Dehradun, and for good reason:

1. Short Duration, Stunning Views

One special thing about the trek is that a trekker can have an exceptional mountain experience with this two-day trek. Those with overloaded schedules can go for this trek and have an incredible trekking adventure without compromising their regular workload.

2. Beginner-Friendly

Covering a distance of 15-16 km is quite easy, especially when you have a trekking leader with you. With gentle trails and perfect hiking weather, the Nag Tibba trek distance is 16 km. And it is one of India’s easiest Himalayan treks, where the views are big, but the effort isn’t.

3. Year-Round Access

Nag Tibba offers four different adventures in one! Return in a new season, and you’ll witness a completely different trail on your journey to reach the summit. Winter’s snow carpets, monsoon’s lush jungles, autumn’s colorful trails, and summer’s floral beauty – the Nag Tibba trek route reveals a fresh face in every season.

4. Incredible Views

Stargazing, mountain views, trails with forests, and wildlife make your Himalayan trek experience truly remarkable. The trek offers incredible views of peaks like Swargarohini, Kedarnath, and Gangotri.

How to Reach Nag Tibba?

The trek starts from Pantwari village near Mussoorie. You can reach here:

  • By Air: The nearest airport is Jolly Grant, Dehradun.
  • By Train: The nearest railway station is in Dehradun.
  • By Road: From Dehradun, take a taxi or bus to Pantwari.

Nag Tibba Trek Itinerary (2 Days)

Don’t rush straight to the trail! Take 10 minutes to visit the ancient Nag Devta temple right at the starting point – locals believe it brings good luck for your journey to Nag Tibba. When you book a Nag Tibba trek package, you won’t miss any of these special moments. Moreover, read the trek itinerary: 

Day 1: Reach Dehradun to Pantwari – Trek to Nag Tibba Base Camp

  • From Dehradun to reach Pantwari (approx. 4-5 hours)
  • Trek from Pantwari to base camp (4-5 km, 3-4 hours)
  • Camp overnight under starry skies at the Nag Tibba top

Day 2: Base Camp to Nag Tibba Summit – Return to Pantwari

  • Early morning trek to Nag Tibba summit (4-5 km, 2-3 hours)
  • Spend time at the top enjoying the views
  • Descend back to Pantwari and drive to Dehradun

Nag Tibba Trek Difficulty Level

Classified as easy-moderate, Nag Tibba offers accessible trails with excellent markings and no technical requirements. The gradient remains manageable throughout, with only the concluding summit approach presenting a steeper challenge, particularly when weather conditions add complexity. This thoughtful progression allows trekkers to build confidence while still experiencing authentic mountain achievement. It’s a great option for:

  • First-time trekkers
  • Solo travelers
  • Families with children above 8 years
  • Working professionals looking for a short getaway

Best Time to Visit Nag Tibba

It’s not just that the season changes here. With seasons, the landscape also changes. During winter, everything has surrendered to snow, and during autumn, the trees color the trekking route with their orange and golden leaves. Let’s explore the seasonal beauty of the trek:

Summer 

Don’t assume that during summer, it will be extremely hot here, and choosing this time can ruin your trekking experience. No, it’s not. During summer, days are comfortably cool (15-25°C) – ideal for trekking in just a light jacket. But when the sun dips behind the mountains, you might need to wear a warm woolen jacket. Also, make sure to carry sunscreen. 

Winter 

Doing the Nag Tibba trek during winter leads to a truly exceptional experience. You walk on snow, play with it, and feel as if you have entered a new realm where peace surrounds you from everywhere. Usually, trekking in snow could be a bit more demanding; however, as the trek is one of the easiest trekking destinations, you won’t need much experience to cover the entire trek. 

Monsoon

You might have seen many people opting to do the trek during the monsoon season on YouTube. However, this season turns the trails into risky ways where walking becomes quite difficult. Therefore, even trekkers with profound experience find it risky to go on the trek during this season. Thus, avoid trekking during this season. 

Autumn 

Walking on the trail covered with dense groves of rhododendron trees with golden leaves gives a wonderful experience. Chills in winter, sunlight during summer, and rain in the monsoon can lower your experience. But during autumn, the pleasant weather lets you focus on the surrounding beauty. 

Packing Tips

In addition to the essential trekking gear, you need to carry a few additional things as well. Bring warm layers (especially in winter) and don’t forget a waterproof jacket. Trek pants will save you from thorny bushes and insect bites. Also, wear a comfortable t-shirt and in winters, a woolen cap and gloves will keep you warm. 

You have to walk a lot while trekking. Therefore, wear good-quality trekking shoes with excellent grips. Buy microspikes (in winter) or ask your trek guides to arrange them for you to trek easily. Also, carry at least two pairs of woolen socks. 

For an excellent experience, you will need a few basic things. These include water bottles, torch/headlamp, and sunglasses & sunscreen. Moreover, pack medicines as well if you have allergies. Having a power bank will help you keep your phone charged. Bring with you light snacks or energy bars to stay energized. 

Conclusion 

A trek that combines adventure, peace, and low difficulty is quite popular among youngsters. The Nag Tibba Trek is one such trek, but note that a trek leader is always required. From arranging accommodation to providing food at base camps, he is responsible for guiding you at every step. Thus, his presence enhances your trekking experience and allows you to return with happy moments.